How to get started with Mini Micro
Mini Micro is a popular environment for creating 2D games and demos in MiniScript. It is a retro-style virtual computer, which runs on most desktop platforms. Mini Micro games can be packaged as stand-alone games for desktop or the web.
This page is meant for people who have never used Mini Micro before, but want to make a Mini Micro game. It is a step-by-step guide to building your first simple demo involving a sprite, game input, and sound effects, including your own resources, as quickly as possible.
Contents
Get Mini Micro
While you can run Mini Micro on the web, the web version has no ability to save files (nor does it support copy/paste). So it's not useful for developing your own Mini Micro games.
Go to the Mini Micro download page, click the button for your platform (Mac, Windows, or Linux), and save the resulting file to your local machine. (If you don't have a Mac, Windows, or Linux desktop machine, then unfortunately you can't use Mini Micro yet, though iOS and Android versions are under development.)
The downloaded file will be a .zip (Mac/Windows) or .tar.gz (Linux) file. Unpack this file completely. Don't try to run Mini Micro from within the archive; extract all files to a real folder on your hard drive.
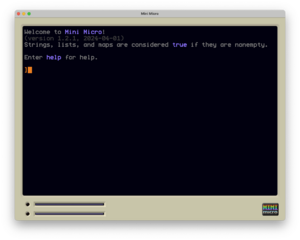
Then, find the Mini Micro application in that folder. Double-click it to launch Mini Micro. The result should look like this.
Mount a folder as /usr
Method 2: Use command-line arguments
Create a sprite
1. Make a sprite from the built-in images
2. Make a sprite from your own custom image
3. Extract an image from a sprite sheet
Play a sound
1. Play one of the built-in sounds
2. Play your own custom sound
3. About synthesized sounds
Write a program
=== Method 1: Use the built-in code editor
=== Method 2: Use an external code editor
=== A simple game demo
